
Part 3: Save Informational Images to Notes App
/
Create a New Photo Habit
Parts 1 & 2 of this photo organizing tutorial help you declutter your main photo library by neatly organizing valuable screenshots and reference photos into folders in the Notes app. When you separate informational images from precious photo memories, you begin streamlining your photo collection to what matters most. And as an added bonus, you find your saved reference material more easily.
Going forward, I recommend creating a new habit of saving all informational images directly to the Notes app. This will save you endless time and effort. In the future you won’t need to take time out to organize these types of photos and most importantly, you can quickly search for what you need.
Before I walk you through how to save new informational images directly to the Notes app, write down the total number of photos in your Photos app as well as the number of screenshots (hopefully, your screenshot count is zero). Then compare these numbers to when you began this photo organizing project — and celebrate your accomplishment!
As you capture your next screenshot or take a reference photo using your iPhone/iPad, pause for a moment and ask yourself if you will actually refer to this information again. If so, save screenshots directly to the Notes app. If you’re sharing the information with a friend, delete the image immediately after sending it by text or email. Finally, take all new reference photos directly within the Notes app. Here’s how:
iPhone/iPad
Software Version iOS 13 or newer
Save Screenshot Directly to the Notes App
Capture the screenshot, then tap the thumbnail to view it (lower left of screen)
Tap the Share icon
Tap NOTES
For Save To, tap NEW NOTE, then tap a folder (i.e. Products to Try)
Tap CREATE NEW NOTE
Add text to your note. Type one or more keywords describing the screenshot to easily search for it in the future.
Tap SAVE
Tap the Trash icon
For Delete Screenshot, tap DELETE
Share Screenshot, then Delete
Capture the screenshot, then tap the thumbnail to view it (lower left of screen)
Tap the Share icon
Tap Messages or Mail
Compose your message and send
Tap the Trash icon
For Delete Screenshot, tap DELETE

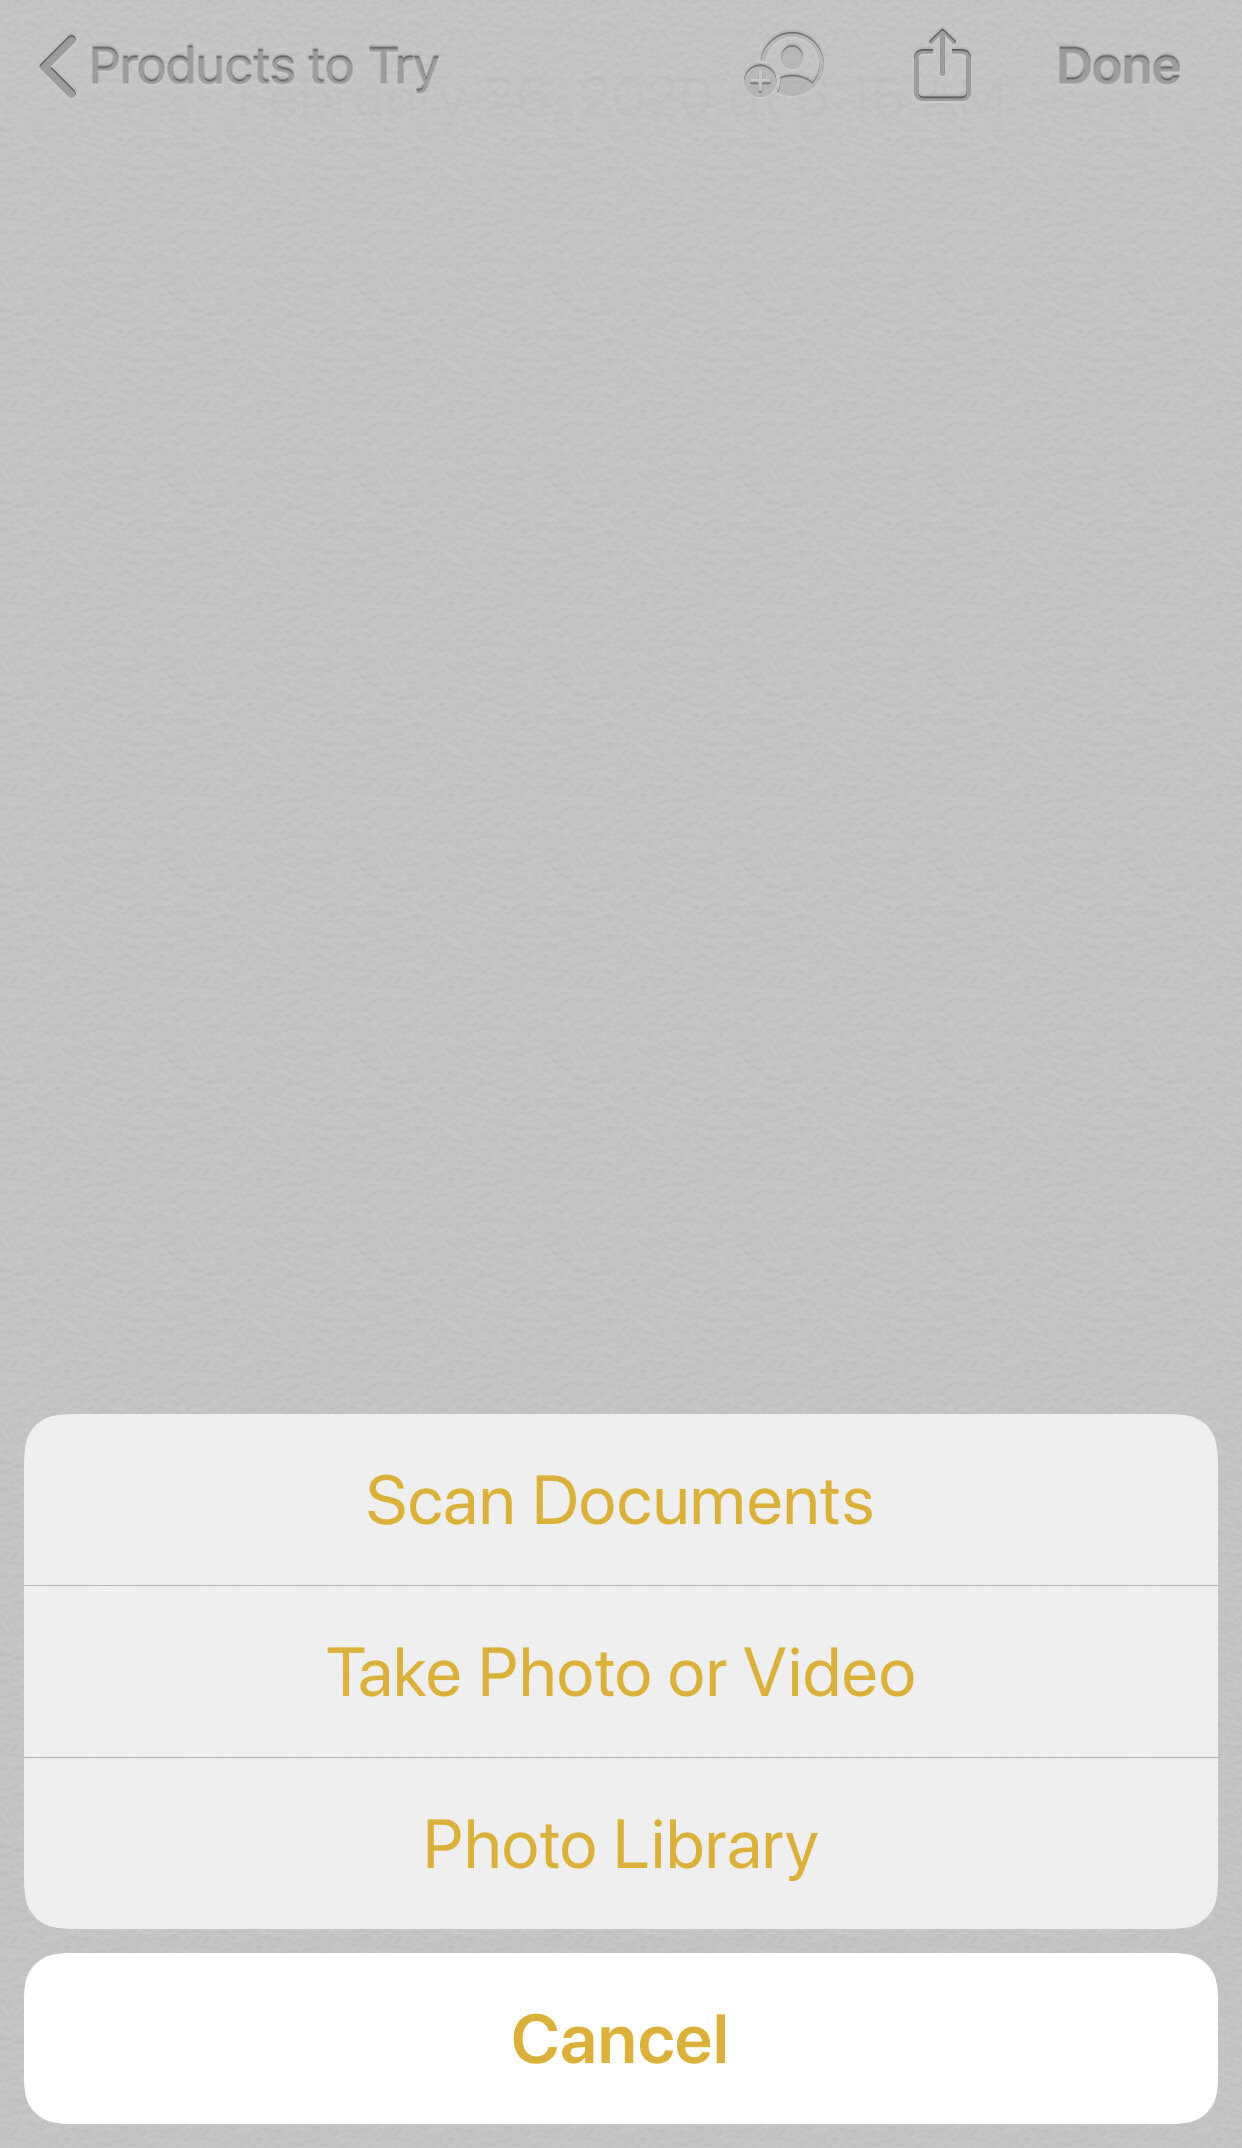
Take New Reference Photos within the Notes App
Open the NOTES app
To view the list of folders in your Notes app, tap the < (top left corner) several times until you see the FOLDERS view
Tap the specific folder (i.e. Books)
Tap NEW NOTE icon (bottom right)
Tap the Camera icon
Tap TAKE PHOTO OR VIDEO
Take the photo
Tap USE PHOTO
Add text to your note. Type one or more keywords describing the photo to easily search for it in the future.
Tap DONE
Fantastic, well done!